Behold! Fancy pants!
The pattern for these pants was one of my Christmas gifts. It comes from Liz at The Craft of Clothes, a zero-waste designer. I've really gravitated towards self-drafting and zero-waste sewing in the last couple of years, and this pattern has been on my list for a good six months, so I was excited to get into it.
Drafting
The first step (after reading the pattern through twice) is drafting the pattern pieces.
My biggest starting hurdle was deciphering "the culottes are designed to sit *on* your waist" when choosing the correct pattern size. Most designers consider "the waist" to be the teapot - that is, the true waist. (It's easiest to find if you bend to the side and stick your hand in the crease - like you're singing "I'm a little teapot".) But some consider belly button height to be "the waist". I generally wear my pants at the latter height, and there's a good 2" circumference difference between those two for me.
I eventually decided to call my belly button my waist, on the grounds that that's where I prefer to wear my pants. It's also easier to take seams in than out, if I guessed wrong.
Decisions over, it was smooth sailing from there. Pattern drafting is not a technically difficult process, as long as you have good instructions, and Liz's patterns definitely fit that bill. But there's a lot of attention to detail required to make sure the end result is good. That sort of thing always makes me nervous. Fortunately there was only two pattern pieces to draft, and they're 98% straight lines and based off rectangles.
Interestingly, this is the first zero-waste pattern I've tried that has you draft pattern pieces to use. The others I've seen (most by the creator of this pattern - our library had a copy of her book, Zero Waste Sewing) have had you draw directly on your piece of fabric to create the layout. (In fairness, I didn't *have* to draft my own pieces. The pattern came with the option of self-drafting, printing on A4, or printing on A0.)
I much prefer the direct-draw method to faffing about with pattern pieces. But given that this pattern is designed to have the pieces tesselate, having a set of physical pattern pieces does make more sense. It's also got me wondering if I could successfully make a pair out of old jeans legs, using one leg per pattern piece. But then, I'm always looking for ways to use up my denim pile...
Sewing
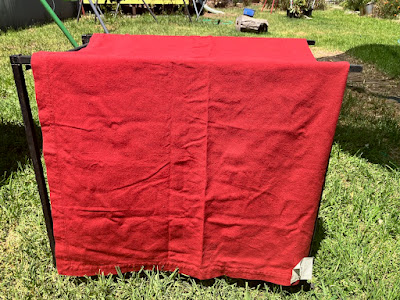
I prefer structure rather than flow in my butt coverings, so I was somewhat limited in my fabric choices for this first pair. (I know the fabric I *really* want to use, but I am being a sensible apprentice and trying things out on a nice-but-less-hideously-expensive fabric first.) Most of my stash acquisition has focused on stuff for shirts, since I wear those out faster than pants. I eventually settled on this nice brick red, 100% cotton, table cloth. (The picture is suffering from sun exposure. It's nowhere near this bright in person.)
I laid out the pieces and huzzah! The fabric was *just* big enough! ... But only if I unpicked the hems (they're monsters, a full 3 cm/1.2" each side) and ironed them flat first. Thus, it was time for a marathon unpicking and ironing session.
After that was done, I checked the pattern fit again. Huzzah! I had enough space for all the pattern pieces, and not very much scrap left over once I'd cut them all out. (Of course, it was late and I wasn't paying as much attention as I should have been, so I didn't add an extra inch when I was forced to cut the waistband in two pieces. There was enough extra fabric that this was only an annoyance and not a complete disaster.)
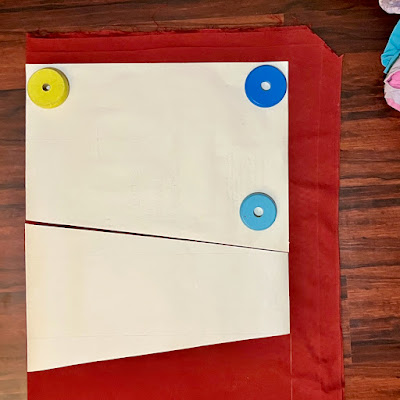 |
| The fabric at the top is scrap. All but a few inches of the stuff on the right became waist bands and plackets. |
Sewing was a fairly straightforward exercise, though it required enough brainpower that I completely forgot to take any progress shots as I went. Almost every step of the pattern comes with a diagram to show you what to do, which helped me immensely. So did having the seam allowances specified at each point, as there's three different ones used in different places.
That's not to say I didn't screw up, of course. While sewing the crotch seam, I somehow managed to close up the front of the pants entirely and leave a gap for the placket open at the back. (That will teach me not to double check the direction the pockets are facing before I pin and sew that seam. Maybe.)
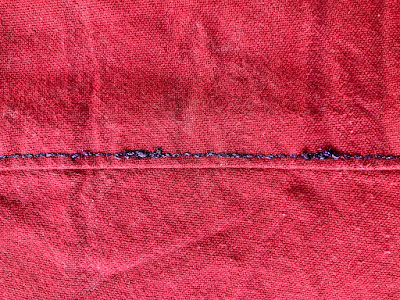
I also made a highly decorative and *completely* awful to sew with choice for topstitching thread, which I quickly became too stubborn to stop using. So the topstitching is, uh, not great. But it *is* purple and sparkly, and if I'd had any sense at all I would have left it til last (or even done some sort of hand embroidery with it).
Why should I have left it til last? Because it turns out that the culottes are, in fact, designed to sit on one's true waist. Which meant I had a two inch difference between what I needed to fit me, and what the waist measurement was. If I hadn't top stitched the panels, I could have simply ran another line of stitching down the seams that didn't have pockets in the way, and taken the waist in without much fuss or bother. Unfortunately, I *didn't* do that, so I was left with two choices.
- Take out the topstitching and take in all the panels, bitching and moaning about the effort I went to and the number of times the topstitch thread broke while I was sewing the stupid sparkly goodness onto things.
- Work out how to take the waist in by the necessary two inches, using only the crotch seam and maybe some darts or pleats or something.
Choice #1 would have been the logical, rational decision, so of course I went with option #2.
An hour and change of basting, pinning and unpinning the waistband, and completely forgetting how seam allowances work later, I managed to get a fit I was happy enough with. I ended up grading in a dart-like object at the centre back. (If I decide later that I'm not happy with the fit after all, I'll try out the modification for adding elastic to the back waistband that the pattern also includes. Probably while questioning my life choices and lamenting the amount of time I spend with a seam ripper in hand.)
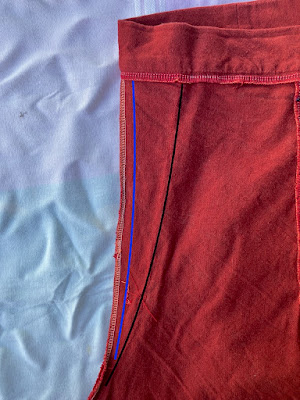 |
| The original stitching line is in blue, the new one is in black. |
After all that fitting woe, I wasn't in the mood to try buttonholes (my good machine, the one with the automatic buttonholer, is currently out of action). Instead I dove into my snap stash to close the placket.
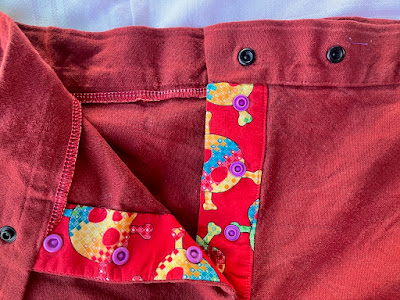 |
| I love using bright, vivid colours for inner details. It's the sewing equivalent of wearing leopard print underwear. |
A nice bonus of using the snaps is that I could put them through *just* the placket, leaving the fly front clean. This did make the placket pull slightly when I'm wearing the pants, exposing a trace of bright red. I fixed that by invisibly whip-stitching through the placket and outer fabric to hold everything in place. Next time I'll also double check the understitching, and topstitch the edge if needed, before installing the snaps.
Field Test and Adjustments
Trying stuff on as you go is all well and good, but nothing tells you what you *really* need to fix like being out in the field. I quickly discovered several things:
- The waistband needs serious help to stay where it's supposed to be. Which, y'know, I *did* make a size larger than I should have. This was not surprising.
- The crotch needs to either drop a wee bit or (preferably) rise a couple of inches. The latter will likely spoil the skirt-effect somewhat, but it will be *far* more comfortable for my legs.
- I need a loop on the waistband to hold my keys.
For the waist woes, I had a few choices - 1) belt loops, 2) suspenders, or 3) add elastic to the back waistband. Belt loops are fiddly to make and sew on, but would solve the key-hanging issue. Suspenders technically wouldn't need any sewing changes, but the clip-on style are notorious for pulling off when you're doing things. And while the pattern includes instructions for adding elastic to the waistband, I wasn't confident it would do the job I wanted (I stick a fair amount of junk in my pockets and elastic can't always cope with the weight).
After some dithering, I went with the suspender option for this pair. I like the look of them, and the "floating" effect they give when they pull the waistband a bit above where gravity wants it to sit is extremely comfortable. But I didn't want to deal with clips always popping off. So I indulged in a quick side-quest of improving my suspenders, then sewed buttons into the waistband of the culottes.
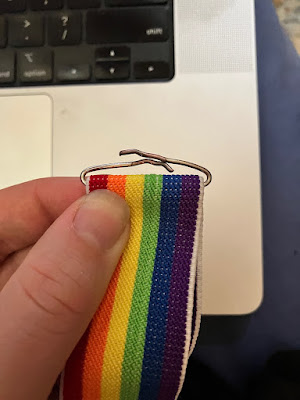 |
| This used to hold the clips, but the wire was easy to bend flat with needle-nose pliers. |
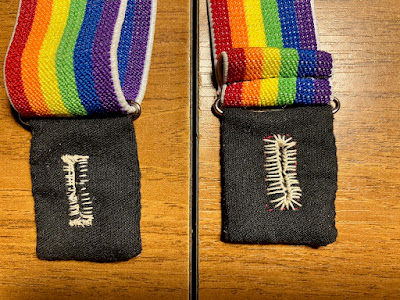 |
| Gee, I wonder which buttonhole I did first? |
Fashion Show
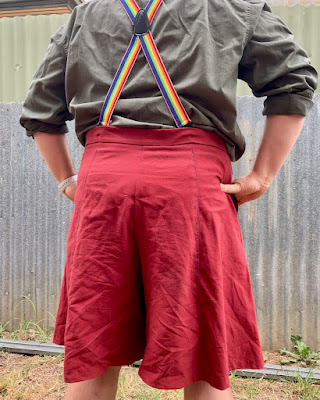 |
| The back panel adjustment is basically unnoticeable. |
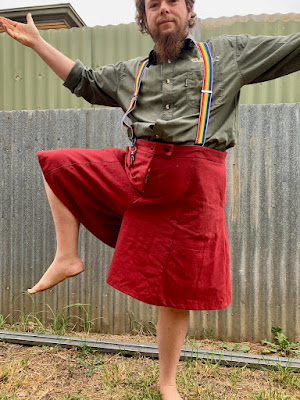 |
| They have great range of movement - maybe I need to make a workout pair? |
 |
| And I even have somewhere to hang my keys. |


No comments:
Post a Comment